Minolta Dual II Operating Tips
The included instruction book for the the Dual II is absolutely terrible,
providing very little useful information. In particular, there is
almost no information about exactly what the available settings really
do. Through trial and error, I have managed to figure out what works
and what doesn't for this scanner. Hopefully this page of tips will
help you with your Dual II learning curve. I expect some users of other
film scanners may be able to benefit from these tips, as well.
Exposure Settings - As far as I can tell, this device has only
two exposure settings, normal and for under exposed slides. The
second one is useless because there is far too much noise at this
setting. Don't bother setting the exposure for underexposed slides
in the preference box. It only adds to the scan time.
ColorSync Profile Setting - This option greatly increases scan time. I don't use it for initial scans because of the additional time. However, if I find a picture I want to print with the best possible quality, I may go back and rescan with colorsync on. Before you bother with this, make sure you have colorsync profiles for your monitor and your printer, as well.
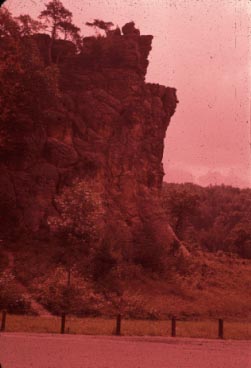
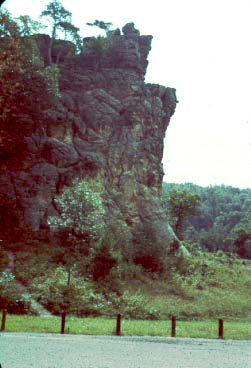
Color adjustments - Now that you aren't using ColorSync and use only the normal exposure setting, you will realize that all adjustments other than cropping and focus are done in software after the scan. Use the software of your choice for color adjustments. I prefer to do initial color adjustment in the 16 bit color space. I have only two programs that can do that. They are the provided Minolta SW and Adobe Photoshop 5.0LE. If I didn't like the curves tool of the Minolta program better than the Photoshop version, I would always scan an image at max resolution, save the raw image and then fix the color in Photoshop on a copy. If I make a mistake, I just revert to the saved raw scan, which is much, much faster than making a new scan. However the Minolta software curves tool is easier for me to use, so I will sometimes do basic curves adjustment with Minolta's software and then save the result for later work in Photoshop. Once I like the basic color of the scan, I convert to 8 bit mode and fix dust, scratches and do whatever else needs doing. The two pictures above show the raw scan of an old slide taken around 1960 and the same scan after just a few minutes of playing with curves in Photoshop. There is no reason with this scanner to try to get a perfect scan. It is much faster to just get the raw scan and adjust afterward.

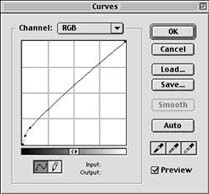
Slides - The dynamic range of many of my slides goes beyond what the scanner can capture. In particular, the dark portion of many slides don't scan very well. The curves tool comes to the rescue in these cases and helps me attain acceptable results. Here is a before and after example of a particularly difficult slide and the curve used to make the adjustment. Note how this sort of curve primarily affects the dark portions of the subject.
Dust and Scratches - Keep in mind that the best way
to get the dust and dirt off of old slides is to remove them from the
old mounts and then remount them after they have been cleaned. I use
three steps for cleaning dust and grime off of slides and negatives. First,
I try to blast the dust off with compressed air. Second, I use PEC-12 for
older slides which have had a chance to gather a lot of dirt and dust. PEC-12
is sold expressly for this purpose. Do follow included instructions. Third,
and last is the Photoshop clone tool, which I use to clean up the remaining
dust and scratches that invariably gets past the other steps.
Macintosh - If you are using a Macintosh, be sure to upgrade to OS X. You will be able to use your computer for other things while it is scanning, such as photoshopping previously scanned images. This makes a world of difference in usability of this scanner. There are OS X drivers available for free download on the Minolta website.