A Low Cost Track Cleaning Car You Can Build
My hardboard track cleaning car
I've been using a sandflex block for a couple of years to clean my track,
but it has been a pain to keep the track clean manually. In some places,
like the tunnels, cleaning has been particularly troublesome, since I have
to climb under the layout to reach the track. I haven't been able to justify
the $80 that a commercial track cleaning car costs. Besides, I would rather
use the budget on a new sound decoder or throttle for my DCC system. Having
read on the rec.models.railroad newsgroup about home made "Masonite" track
cleaning cars, I decided to go ahead and build one. What follows is some
notes on construction and operation..
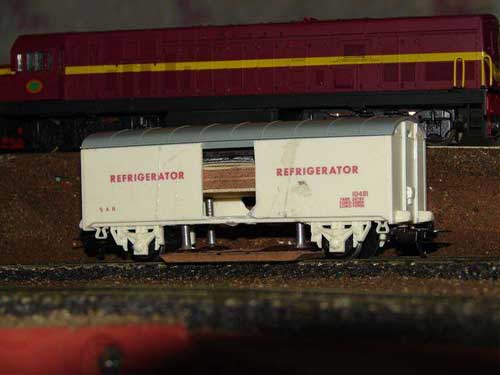
A side view showing the nails coming up through the boxcar chassis and supporting
the weight
Basics
The basic design consists of 4 box nails with the sharp end cut off and
the flat head epoxied to a rectangular piece of hardboard. It is sized to
fit under an Athearn boxcar that I have. The nails protrude through the
bottom of the car and fit into sockets drilled into the bottom a fairly thin
piece of wood. On top of the wood, I have screwed on some sheet lead formed
into a shape that fits into the body of the boxcar, without binding. The
boxcar body goes over everything. When running it, it is not obvious that
this is a track cleaning car.
Materials
- a box car
- 4 box nails (make sure they have the flat heads)
- adhesive - I used 2 part epoxy
- a fairly thin piece of wood - say 3/8" or so.
- a weight to anchor to the wood
- a few small screws to do the anchoring
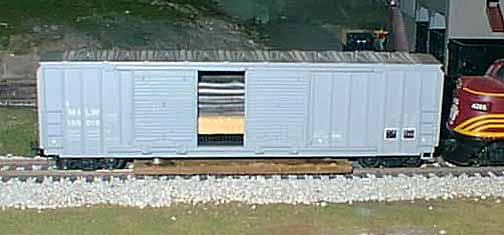
Converting the Boxcar
I picked my least favorite boxcar for this conversion, but it turned out
to be a good choice. This is a 50' boxcar with a fairly long wheelbase which
allows a longer cleaning surface and more weight inside. Also it has double
doors on each side which open pretty wide. This allows easy examination and
adjustment of that weight. To convert the boxcar all you have to do is to
drill 4 holes in the chassis near the sides and inside the trucks. Use a
slightly larger drill bit than the diameter of the nails you will using in
the next step. This is so the nail don't bind when they slide up and down
through the chassis.
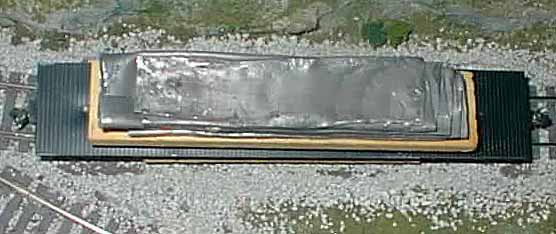
Construction of the Hardboard (Masonite) Cleaning Block
Cut a piece of hardboard to ride under a boxcar you have chosen for this
conversion. This piece should be about the width of the car body. Mine is
just over an inch wide. The length should be as long as is reasonable, but
not so long that the piece interferes with movement of the car's trucks.
Mine came out to five inches long. Once you are comfortable with the fit,
glue 4 nails with points cut off onto the smooth side of this board. The
rough side will ride on the track. To glue the nails, place the hardboard
underneath the predrilled chassis. Glue the nails to the board with the nails
protruding through the chassis. The chassis is used as a jig to ensure accurate
fit.
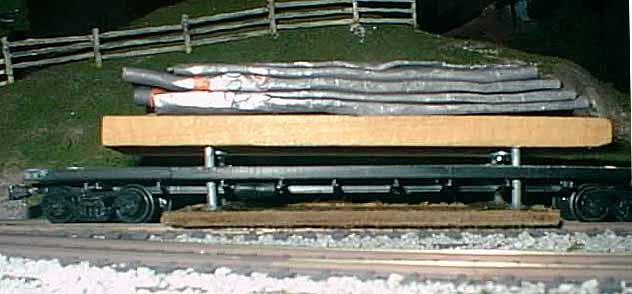
Making the Weight Platform
A wood platform rides on the 4 nails and is used to hold the weight. I
used a scrap of wood I had laying around that is about 1/4" thick. I cut
this piece so that it fits loosely inside the body of the boxcar. Next
I drilled holes part way through the bottom of this piece of wood to engage
the nails coming up through the bottom of the chassis. To make sure I located
the holes correctly, I put drops of wet paint on each nail point and carefully
set the block into position. The wet paint should leave spots where the holes
should be located. I then drilled the holes partly into the wood. I used
a drill bit slightly larger than the nails, so there was a little slop in
the fit. I used a drill press with a depth stop to ensure I didn't drill
all the way through the wood. You can also use masking tape to put a stop
on the drill bit itself to make sure you don't drill all of the way through.
Another option is to use two thinner pieces of wood. Drill completely through
one piece and then glue the second piece onto the other. Make sure the
boxcar body fits freely over the assembled unit.
A top view showing how the weight fits into the body
Adding Weight
I used sheet lead folded and hammered into a shape that will fit into the
boxcar body. I screwed through the bottom of the wood and into the lead to
fasten the lead sheet to the wood. If you don't feel comfortable using sheet
lead, you can use the wood as an base for any other heavy object you can
think of. You can glue or screw the object to the wood. One example is
to use washers. You can screw up from the bottom of the wood and use the
screws as posts that will hold the washers. This way you can adjust the
weight of the car according to conditions. The weight of my car is 14 ounces.
I originally had 10.5 ounces riding on the sled. After having a bit too
many problems with derailments, I have shifted 2.5 onces from the sled to
the chassis, which seems to have improved things quite a bit.
Trials and Adjustments
I have enough weight in my car that it really takes two locomotives working
together to smoothly move it, which is no problem for me. I also found that
one side of my sled caught on a track side switch machine at one location
on my layout. A few passes with a hand plane to narrow the sled on that
side and that problem was taken care of. At first I applied Goo Gone to the
track and sled, which is an option, but now I'm just running it without cleaning
solutions.
Results
So far I am pleased with the results. In one tunnel which has been hard
to reach and where locomotives tended to stall, a few passes seem to have
resolved the problem. At another place in my locomotive yard, a switcher
stumbled through one switch. A couple of passes of the track cleaning car
seems to have taken care of the situation. I'm not sure how long the hardboard
sled will last, but building a replacement sled will only take a few minutes.
Once I shifted a few onces from the sled to the chassis, tracking of this
car has been fine, with only a rare derailment, .
Visitor Submitted Versions
Works like a bomb according to Martin from South Africa.