Check out my youtube channel for a demonstration.
I also put together a webpage describing how an Apple II controls the switches.

Check out my youtube channel for a demonstration.
I also put together a webpage describing how an Apple II controls the switches.
I’ve been putting more video’s up on my youtube channel. The latest is a demo of my Macintosh 128K. If you are interested in the history of Macintosh computers, take a look.
I also added a web page with a pretty detailed description of the hardware that I have used to provide automatic locomotive operations.
I have spent a considerable amount of time over the last couple of months restoring a very flakey Apple II plus motherboard to something approaching reliable operation. I expect that over the next few weeks, some final testing and debugging will resolve any possible remaining issues and I will be able to declare that the system is working completely reliably.
At the start of this effort, this particular motherboard occasionally worked properly, but never would stay working for long. In the past I had worked with other early rev Apple II motherboards that had similar intermittent issues and assumed that a lot of this intermittent behavior was due to connector issues, as reseating chips usually improved or at least changed behavior.
In the past those flakey boards have ended up on my spares pile, but I was determined to get this one working properly. Though I did encounter flaky sockets, I found many chips that had bad outputs, which made me wonder how the computer worked at all. Once I started finding and replacing these bad chips, the stability of the computer improved dramatically.
I have posted a youtube video that shows how I debugged one particular bad chip.
I’m restoring a very early Apple II plus in order to sell. I believe that this particular unit is a very unusual example of an Apple II plus, as it has the second style keyboard with “domed” power light.
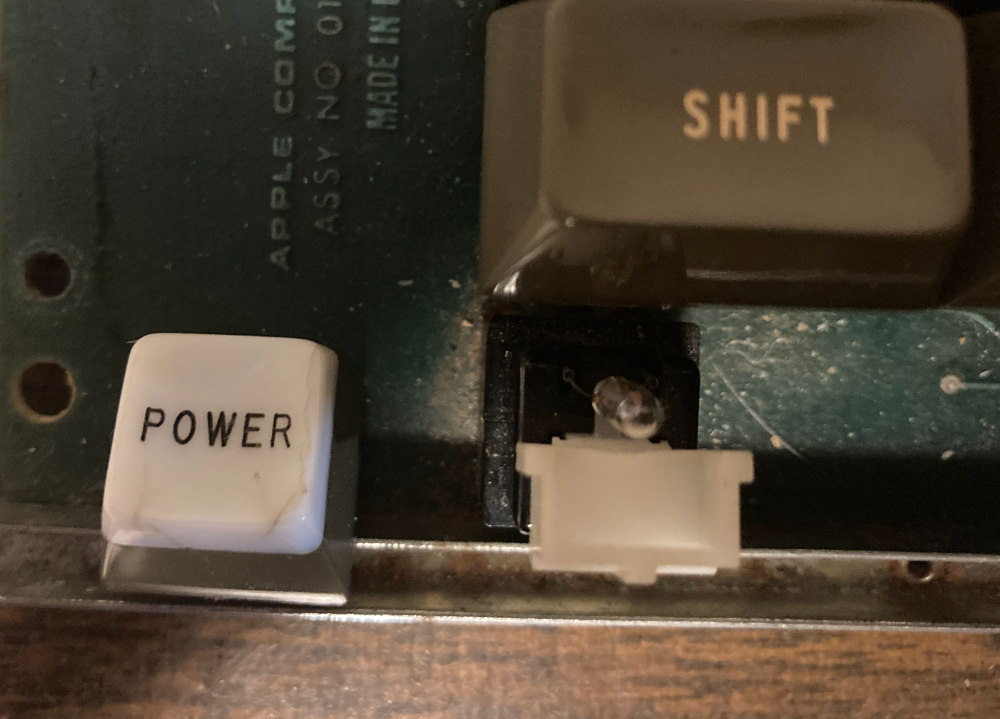
The bulb in this power light was burned out, so I did some searching and found an exact replacement is still available.
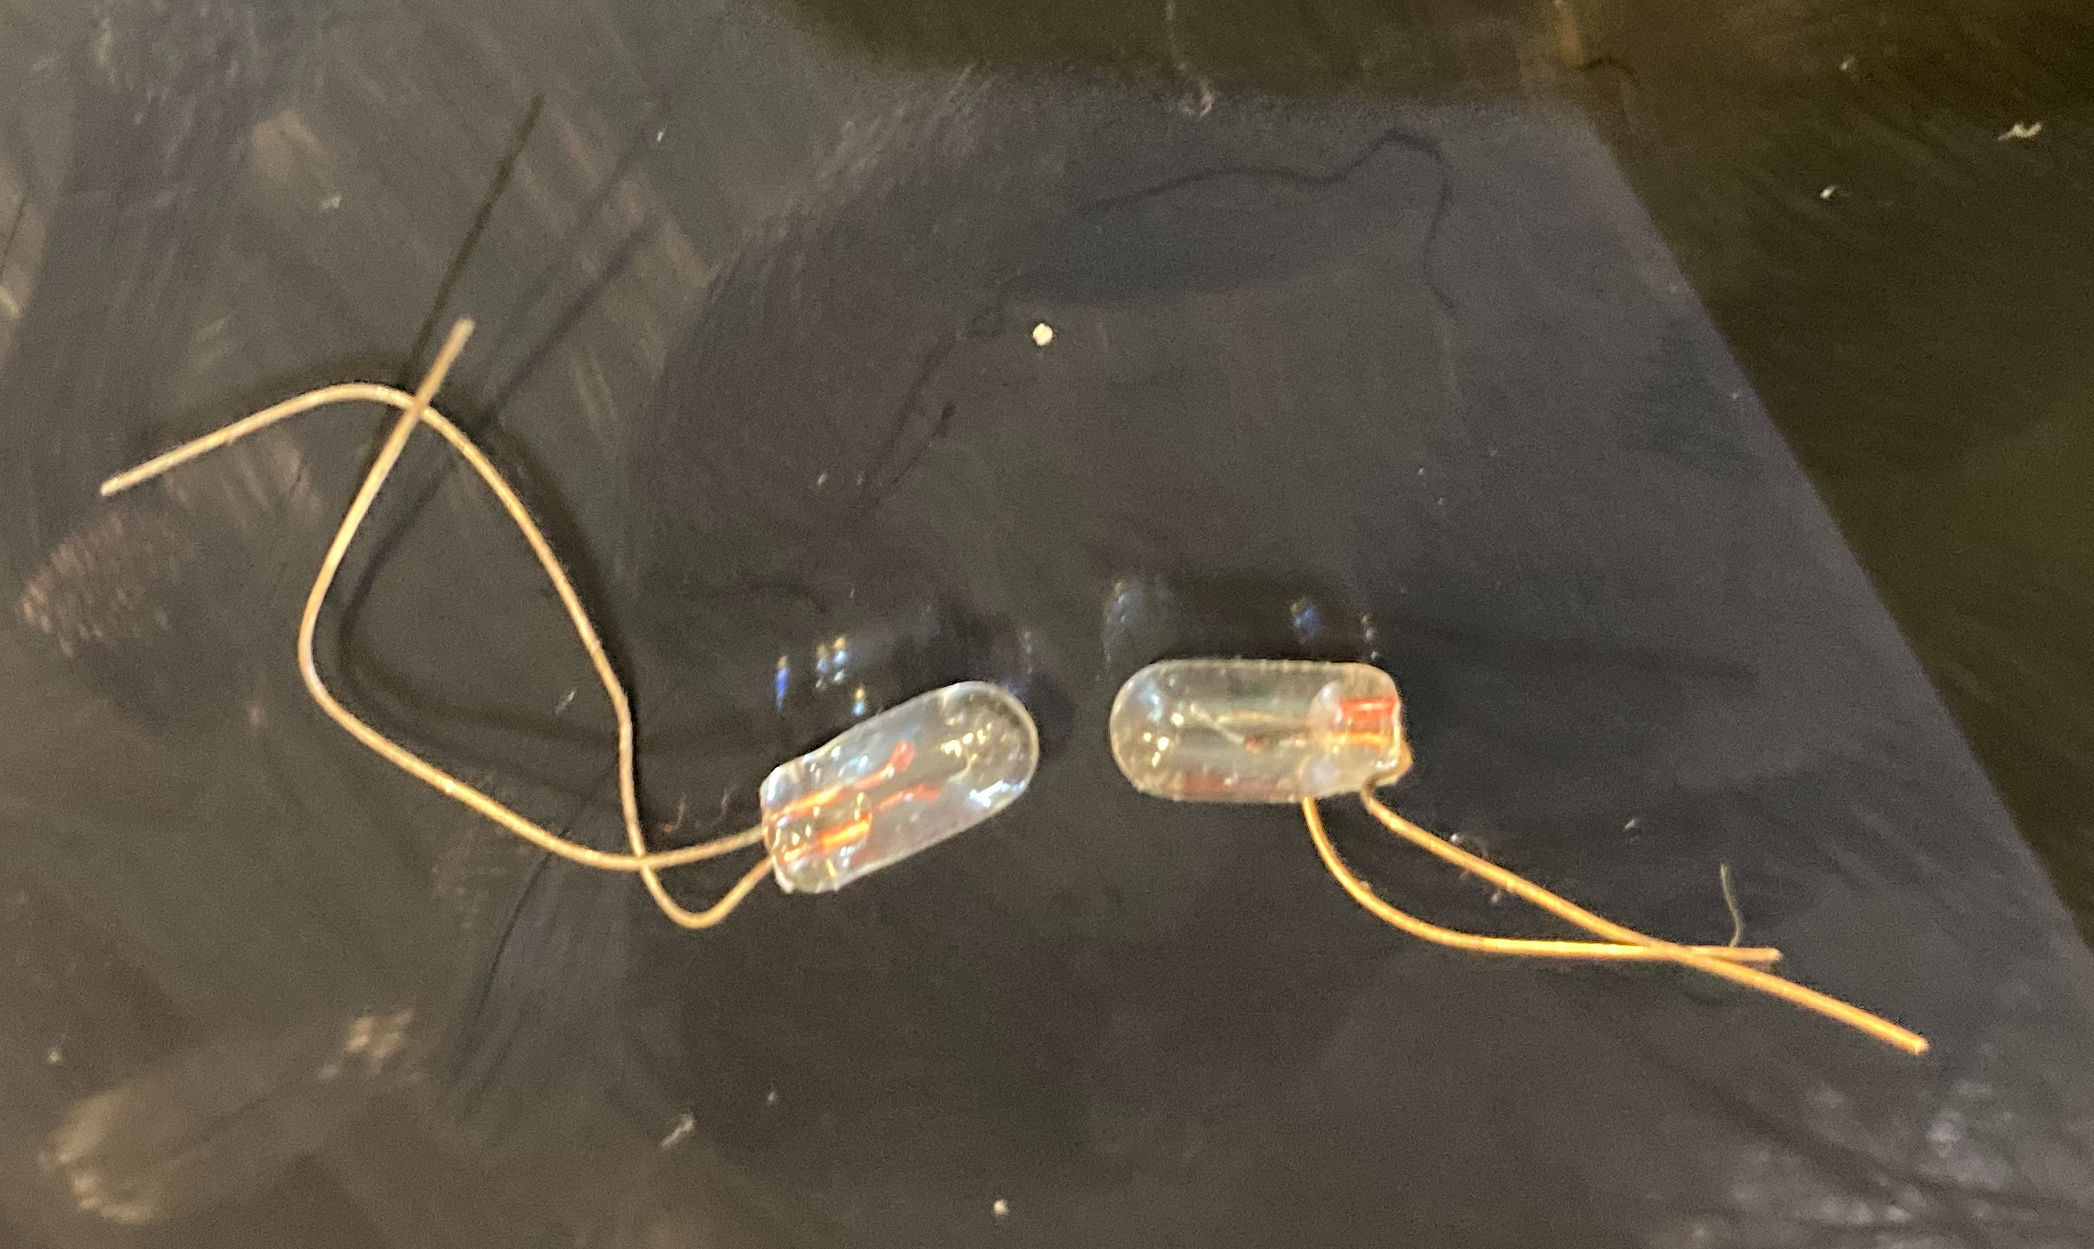
The bulb on the left is the replacement and the one on the right is the burned out original. The bulb type is a #680 miniature bulb with a wire terminal base. You can find these bulbs for 31 cents each, plus shipping, at www.bulbtown.com. Here is a direct link:
https://www.bulbtown.com/680_Miniature_Bulb_Wire_Terminal_Base_p/680.htm
In case this link goes away at some point, here are the specs:
| #680 Miniature Bulb Wire Terminal Base – 5 Volt .06 Amp 0.3 Watt T-1 Wire Terminal Base, .03 MSCP C-2R Filament Design. 0.25″ (6.4mm) Maximum Overall Length (M.O.L.), 0.13″ (3.2mm) Maximum Outer Diameter (M.O.D.). 60,000 Average Rated Hours. |
I’ve run this system over the course of many hours with the new bulb installed. The illumination is exactly the same as with an original bulb and there are no problems with the amount heat generated by the replacement bulb.
This lamp is only a replacement for the bare wire lead bulbs present in early keyboards, as later Apple II keyboards have a different style keyboard power lamp.
See my early Apple II keyboard page for more information on early Apple II keyboards.
I had to create this to debug a Apple IIc alternate memory bank issue. The source has been added to my 6502 memtest page.
In the next day or so, I’ll be adding a youtube video to my channel showing the repair (but not the diagnosis).
The first video is an Apple IIc demo. Once I’m convinced it is 100% working, I’ll be listing this machine on eBay. I’ll be demoing other machines in the future. I’m starting with some machines I need to move out, since I need the space for future activities. Eventually I’ll be demoing some of my keepers like the SCELBI and Apple 1 clones.
You can download this story from my new feature story web page. As well documented as the Apple 1 is, this story contains a few tidbits that haven’t been published before.
Going forward, I hope to add a new story to this page every month or two. These stories are going to a be a little more polished than my blog entries and other web pages.
I just ran across this old image that was used to make a poster for the first VCF that I had an exhibit at. Based on the date on the files, it looks like the poster was designed in 2008.
![Apple ][ replica poster](http://www.willegal.net/blog/wp-content/uploads/2021/02/apple-add.gif)
The main thing that struck me is that I can’t believe what I was thinking, selling those kits for only $349! You can’t imagine how much effort it took to gather together all the parts and then assemble kits. Eventually I gave up on the kit idea and just sold bare boards. All told, I think I sold something like 16 boards and kits and kept a couple of boards for myself. I made a little money on the project, but if you counted up the hours and calculated an hourly pay rate, it had to be way below than minimum wage.
You don’t find many electronics kits manufacturers these days. I think the main reason is that it is now actually cheaper to build an electronic item than package a kit.
I am sometimes surprised at how little money that some people ask for bare reproduction PCBs. Sometimes, I see people asking less money than what I paid for those PCBs. I suppose if you really dig around, you may be able to find a fab house in Asia that will make a PCB for almost nothing, but my investigations always showed that for larger PCBs and small runs, the most popular offshore fab houses, really weren’t that much cheaper than domestic ones. Thus, I always have my PCBs made here in the USA.
Quite a while ago, Wendell Sander sent me an example of his Apple 1/Apple ][ compatible keyboard design. Over the past couple of years, I’ve used it with my SCELBI as it can also be connected to a SCELBI keyboard interface. I didn’t have an enclosure, but had it mounted on a couple of blocks of wood.
For a long time, I’ve envisioned building a proper enclosure for it. Well, I finally got around to doing just that. I recycled some red oak that I had cut to a bit less than 3/8″ thick and had used for a while in another project that is now not needed.
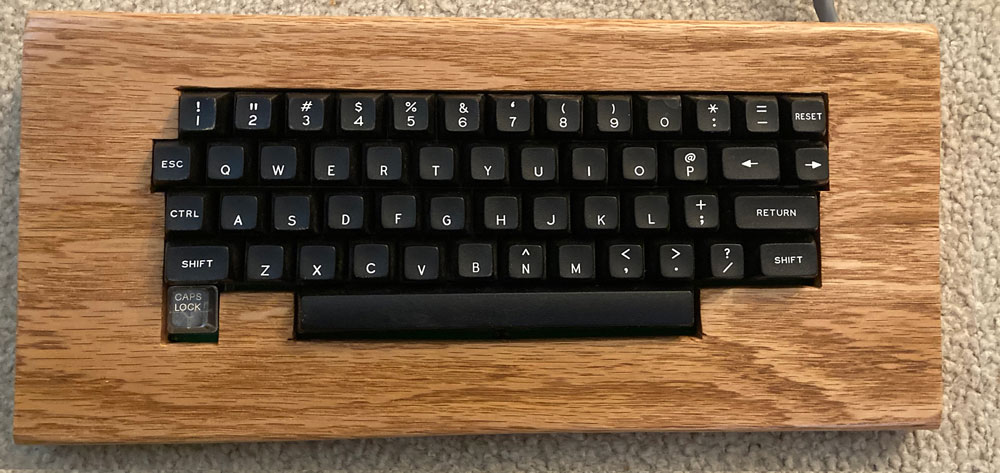
I think it looks quite nice. There is no rear cover, but I suppose I could add a sheet metal cover , if I decided I really needed one.

For those that are interested in making their own Apple II compatible keyboard enclosure, the following drawing can be used to cut out the faceplate.

Back in 2015, I partially described how I used an early Apple serial card in an Apple ][ to provide a “glass” TTY emulation in order to check out some of my SCELBI software and interfaces. Since I don’t have a real TTY, I always had to set up the Apple ][ and download an emulation program via cassette tape interface in order to test the SCELBI with an TTY interface. Over the years, this has been an annoying bit of hassle, mainly because I usually forgot exactly what version of the software that I needed to download, exactly where in memory to download it, and what slot to put the serial card into.
I knew that I could create a turnkey power on and go solution by designing and building a custom Apple ][ peripheral board. I just needed to copy the current loop interface from the Apple Serial card to a Superproto board and drive it with the Superproto’s 6522 VIA interface hardware. I knew I could easily port the program I had already written to run right out of the Superproto’s EERPOM. I first thought about doing this years ago.
Finally I started to do something at the beginning of this year, when I ordered the few required hardware components that I didn’t have in my stash. These parts came in right away, but, until now, I haven’t found the time to build up the board and port the software.
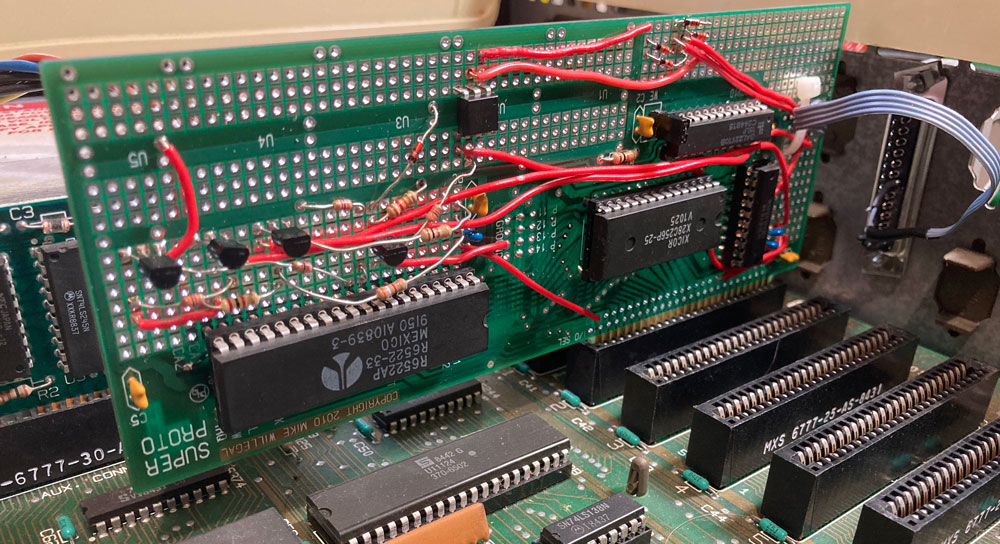
Well, I finally found the time to get this project working. I think the result is pretty cool. To connect a TTY with a 110 baud current loop interface to my SCELBI, I just connect the Apple ][e to a monitor, the SCELBI and power it up. No need to bother with floppy disks or cassette interfaces, or anything else. Since this card looks like a Disk ][ to the Apple, the Apple will automatically boot the TTY application, which resides in the Superproto’s EEprom.
I could potentially add logging, paper tape emulation and scroll back capability to this application, but I probably will not proceed with those ideas, at least anytime soon.
One other thing I might do, is create a version of software that will work at 45.45 baud and the Baudot charactor code, so I can use it with RTTY applications. I have done a simple version of this software for the Apple serial card, so it shouldn’t be too hard to port over. Since the Superproto supports multiple banks of memory in the EEPROM, I can use the same board and just put the RTTY app in a separate bank, and use the bank select jumpers to switch between TTY and RTTY applications.
Someday, I might make a custom card for this design, but I’m not going to do this unless I hear about some kind of demand for such a card.
Let me know if you are interested in seeing more details of the software and hardware design.